Drying Boilies Correctly: How to Avoid Mould and Spoilage
The drying process is absolutely essential when making boilies.
Poor drying can lead to instability, mould growth and, in the worst cases, complete spoilage of the bait.
In the “How to Make Boilies” chapter on the website, I strongly recommend freezing as the safest storage method. However, judging from the many questions I receive, a lot of anglers still prefer air-drying their baits on racks or in breathable bags. So let’s look at the subject in a simple and practical way.
Humidity Is the Real Enemy
The biggest problem during drying is humidity.
This becomes particularly critical during autumn and winter, especially in areas affected by persistent fog and damp weather — like much of the Po Valley here in Italy.
Without proper ventilation and moisture control, boilies can easily develop mould or remain unstable internally.
The First Step: Cooling the Baits
The drying process actually begins immediately after cooking.
The first phase is cooling the boilies properly.
This can be done very simply by:
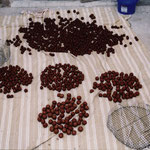
* Spreading the baits on a cloth outdoors during dry weather
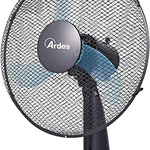
* Placing them on drying trays with airflow generated by an electric fan
Good airflow is extremely important at this stage because it prevents condensation from remaining trapped on the surface of the bait.
Drying Racks and Containers
Drying can be done using:
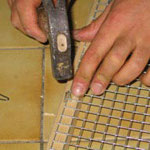
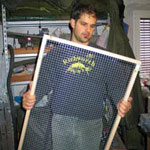
* Homemade racks
* Perforated drying trays
* Pasta drying boxes
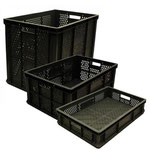
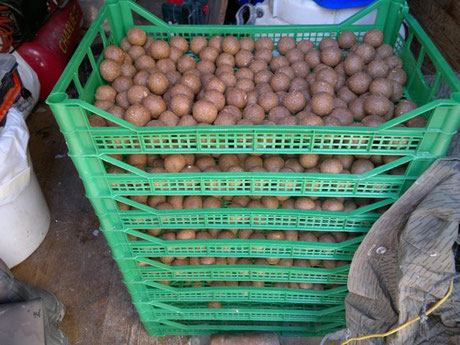
* Stackable plastic crates
One of the cheapest and smartest solutions is using perforated stackable crates from greengrocers or butchers.
They are inexpensive, easy to stack and very easy to sanitise after use with alcohol or diluted bleach.
How Long Should You Dry Boilies?
After cooling — which usually takes a couple of hours — the actual drying phase begins.
This can last:
* 48 hours for lightly dried freezer baits
* Several weeks
* Or even months for ultra-hard air-dried baits
The longer the drying period, the harder the boilies become.
Extremely hard baits can be very useful when baiting waters full of nuisance fish because they resist attacks much longer.
Fresh vs Air-Dried Attraction
Fresh boilies always release attraction faster than heavily dehydrated baits.
A moist freshly cooked bait leaks soluble substances much more aggressively.
However, this difference becomes far less important when prebaiting consistently because the fish simply become accustomed to that food source over time.
For short sessions or instant fishing, though, lightly dried freezer baits are usually the superior option.
Personally, I prefer freezing after a maximum of two days drying whenever possible.
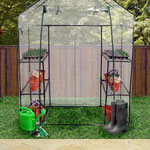
Building a Proper Drying Room
If you live in a humid environment, the ideal solution is creating a closed drying area equipped with active dehumidification.
The cheapest options are usually:
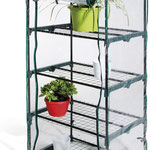
* Indoor PVC greenhouses
* Plastic tool sheds
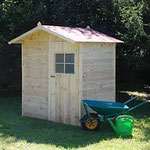
* Wooden garden sheds
* Small metal storage units
Personally, I use a 3x3 metre wooden shed because I prefer keeping all the odorous bait work outside the house — but that obviously depends on budget, space and local regulations.
A simple 2x1 metre PVC greenhouse can already dry several hundred kilos of boilies and costs very little.
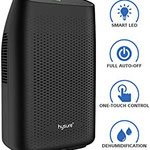
Using a Dehumidifier
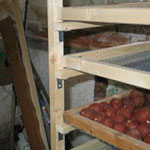
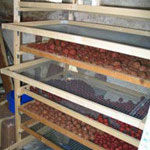
Inside the drying space, trays should always be stacked with:
* A single layer of boilies per shelf
* Enough spacing for air circulation
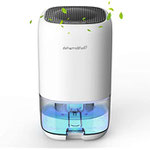
At this point, the most important piece of equipment becomes the electric dehumidifier.
These machines continuously recycle air, condense moisture and collect the water inside a reservoir.
Even small domestic models are usually more than enough for boilie drying.
More advanced systems can also be programmed with humidity sensors to start and stop automatically, although these become more useful in larger bait rooms or storage sheds.
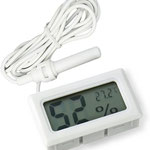
Monitoring Humidity
If your setup is simple, it’s still worth buying a small hygrometer to monitor environmental humidity.
After around 48 hours of drying, moisture levels inside the bait usually decrease dramatically and you’ll notice the dehumidifier collecting less and less water.
At this point, the boilies can be:
* Frozen
* Stored in airtight buckets
* Left in the drying room
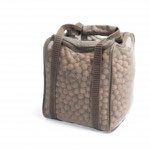
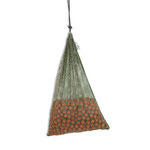
* Placed into breathable mesh bags and hung up
This also frees up the drying trays for new bait production.
In my book you can find a dedicated chapter covering preservatives and long-term bait storage.
The gallery includes pictures of the different drying solutions and setups discussed in this article.
Boilies,the Art and Science of Carp Bait